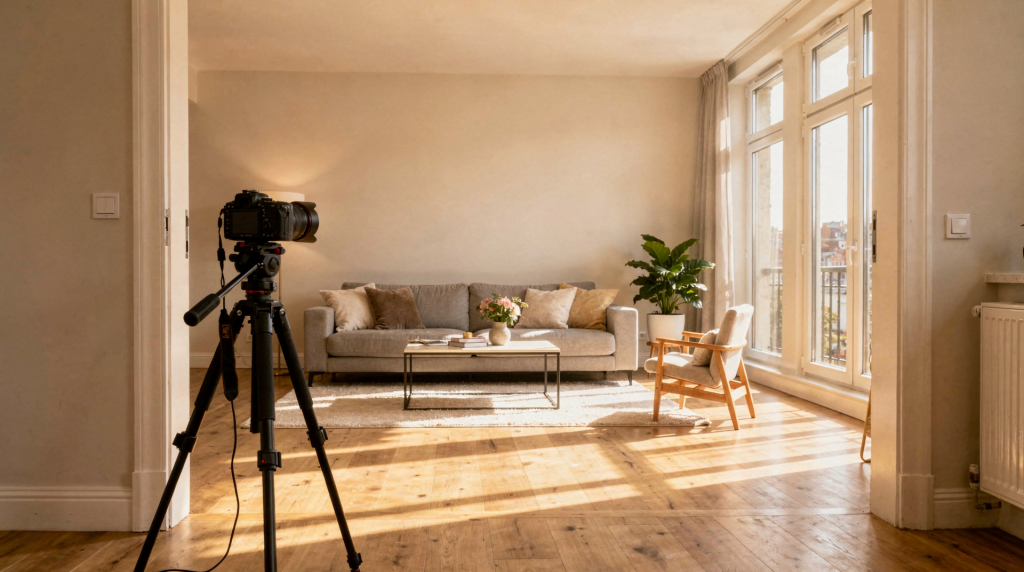
A listing photo has about two seconds to earn a click. In that time, the viewer isn’t analyzing square footage or counting windows — they’re feeling whether the space makes sense. Does the light fall naturally? Can they picture their morning routine here? That immediate, almost subconscious read is what separates a photo that gets scrolled past from one that prompts a showing request.
Over years of shooting apartments, I’ve learned that the camera doesn’t just record a room — it interprets it. The same 600-square-foot unit can feel airy and intentional or cramped and forgettable, depending entirely on how it’s photographed. The difference isn’t about trickery. It’s about understanding how light moves through compact spaces, where to place the tripod so vertical lines stay true, and why twenty minutes of prep work often matters more than an hour of editing.
Why apartment photography is different
Shooting a detached house gives you room to breathe. You can step back, experiment with angles, and usually count on decent natural light from multiple directions. Apartments don’t offer that luxury. Square footage is tighter, windows often face a single direction, and neighboring buildings can block light you were counting on. Every compositional decision carries more weight because there’s simply less margin for error.
A wide-angle lens pushed too far into a corner can stretch a bedroom into something unrecognizable. Stand in the wrong spot, and a functional galley kitchen reads as a narrow corridor. These aren’t hypothetical scenarios — I’ve walked into listings where the agent’s DIY photos made a perfectly livable apartment look like a storage unit, simply because the camera was aimed at a blank wall from the center of the room.
When someone browses listings, they’re running a rapid mental checklist. They want to know three things almost instantly:
- Does this apartment feel spacious enough for my needs?
- Is there genuine natural light, or will I be living under lamps?
- Does the layout flow logically, or will I be navigating awkward corners daily?
A well-shot gallery answers those questions before the viewer reads a single word of the description. That’s the benchmark I work toward on every shoot.
Our approach: show the space, not just the furniture
There’s a temptation in real estate photography to stage every surface until the apartment looks like a catalog spread. I take a different approach. The goal isn’t to impress someone with décor — it’s to help them understand the bones of the space. Good flow between rooms. A kitchen that actually functions. Storage that’s been thoughtfully integrated. A window placement that means natural light at the right times of day.
This philosophy shapes everything that happens before the shutter clicks. A studio apartment photographed honestly, with its proportions respected and its best features highlighted, will always outperform a misleadingly wide shot that leaves viewers disappointed at the door.
1. Prepare the apartment room by room
I’ve walked into shoots where the agent assured me the unit was “camera-ready,” only to find bathroom counters covered in toiletries, kitchen appliances crowding every inch of counter space, and blinds twisted at three different angles. We spent forty-five minutes prepping before a single frame was captured. That’s not unusual — and it’s not wasted time.
Preparation does more for the final result than any editing technique I’ve learned in fifteen years behind a camera. A clean, quiet frame lets the architecture speak. Clutter, even small items, pulls the eye away from what matters: the room’s proportions, the light quality, the relationship between spaces.
Here’s the prep sequence I follow on every apartment shoot:
- Clear all personal items from counters, nightstands, and visible wall surfaces — family photos, mail piles, toiletries, spice racks
- Remove pet bowls, litter boxes, visible cords, chargers, and cleaning supplies
- Edit kitchen counters down to two or three neutral items — a wooden cutting board, a simple fruit bowl, a clean coffee maker
- Make beds with tight hospital corners and smooth out all wrinkles in bedding
- Align chairs, straighten rugs, and ensure window treatments hang evenly
- Open blinds and curtains completely — partial openings create distracting stripe patterns in the final image
- Turn on every fixed light source, and where possible, ensure bulbs match in color temperature
I’ve learned to check reflective surfaces obsessively. A bathroom mirror that catches my tripod reflection, a glass cabinet door showing a light stand, a window that reveals the building across the street in unflattering detail — these are the things you catch during prep, not in post-production.
2. Choose the right time of day
Natural light is the single most powerful tool in apartment photography, and timing it correctly can make or break a shoot. I schedule most sessions between 10 a.m. and 2 p.m., when daylight is stable and shadows aren’t stretching aggressively across floors. But the specific window depends heavily on orientation.
East-facing apartments come alive in the morning, with soft, directional light that adds dimension without blowing out highlights. By afternoon, those same rooms can feel flat and shadowed. West-facing units are the opposite — they need that later window when the sun has moved around to fill the space. I’ve rescheduled shoots twice because a client insisted on photographing a west-facing living room at 9 a.m., and the resulting images looked like they were shot on an overcast day despite clear skies.
Direct sunlight through large windows creates a specific problem: extreme contrast between bright patches and deep shadows. The camera’s sensor can’t handle that range gracefully, even with HDR techniques. When I’m dealing with strong window light, I’ll often soften it with sheer curtains or angle the blinds to diffuse the beam without blocking it entirely. The room stays bright, but the light wraps around surfaces instead of cutting across them.
How we choose camera angles
Angle selection is where technical knowledge meets spatial intuition. A room photographed from the wrong position can lose all sense of depth, while the right corner placement reveals how the space actually functions. I spend the first few minutes of every shoot walking the apartment and testing sightlines before the tripod ever leaves its case.
The 2-wall rule and why it works
Early in my career, I shot interiors the way I’d shoot a portrait — straight on, filling the frame with the subject. It took exactly one apartment listing to realize that approach flattens rooms into unreadable boxes. The viewer can’t gauge depth, can’t understand the relationship between walls, and can’t mentally place furniture.
The framework I use now is simple: show two walls, enough floor to establish scale, and enough ceiling to give the room vertical breathing room. This creates a natural vanishing point that pulls the eye through the space. It’s not about making rooms look bigger — it’s about making them legible.
Mistakes I see repeatedly in DIY listing photos:
- Camera aimed directly at a blank wall, cropping out the room’s actual dimensions
- Shooting straight into a bright window, which forces the camera to expose for the light and turns the interior into a dark cave
- Standing too close to a piece of furniture, making it dominate the frame while the rest of the room disappears
- Tilting the camera up or down, which bends vertical lines and makes walls appear to lean inward or outward
That last point — keeping verticals straight — is something I’m almost obsessive about. When door frames and wall edges converge or diverge, the image feels subtly wrong even if the viewer can’t articulate why. A level camera communicates stability and professionalism. It’s one of those details that separates a listing that feels trustworthy from one that feels off.
Best camera height for apartment interiors
I set my tripod at roughly 1.2 meters — about chest height for most people. This isn’t an arbitrary number; it’s the height at which furniture relationships read naturally. Kitchen counters don’t look towering, beds don’t dominate the foreground, and the transition between floor and wall stays proportional.
Drop the camera too low, and suddenly the bed becomes the entire composition, with the rest of the room receding awkwardly behind it. Go too high, and the room flattens out — you lose the sense of ceiling height, and the space feels less intimate. I’ll adjust slightly depending on the room: a bathroom with a tall vanity might need an extra few centimeters, while a living room with low-profile furniture can handle a slightly lower position. But 1.2 meters is my starting point every time.
The equipment choices that make a difference
You don’t need a studio’s worth of gear to photograph apartments well, but a few deliberate investments pay for themselves in consistency and image quality. Here’s what I rely on:
| Tool | Why it matters | Practical note |
|---|---|---|
| Wide-angle lens | Captures the full room without requiring you to back through a wall | I work in the 16–24mm range for interiors; anything wider starts introducing distortion that’s hard to correct naturally |
| Tripod | Keeps shots sharp at slower shutter speeds and ensures consistent framing across rooms | Essential when balancing window light with interior exposure — handheld simply can’t hold steady enough for bracketed shots |
| Camera with manual exposure control | Lets you balance bright windows against darker corners without relying on auto modes that make poor decisions | I shoot manual for every interior frame; auto-exposure gets confused by mixed lighting and reflective surfaces |
| Lens correction in editing | Fixes barrel distortion and straightens lines that wide-angle lenses naturally curve | Critical for door frames, cabinet edges, and any straight architectural line — viewers notice when they’re bent |
A note on wide-angle lenses: they’re essential, but they’re also the most misused tool in real estate photography. I’ve seen listings where a 12mm lens made a modest living room look like a ballroom, and the backlash when buyers arrived was immediate and justified. I stay in the 16–24mm range because it gives rooms breathing space without distorting proportions. The goal is accuracy with a slight sense of openness — not visual deception.
What we photograph in a typical apartment
A listing gallery shouldn’t feel like a random collection of rooms. It should guide someone through the apartment in a logical sequence, helping them build a mental map of how the spaces connect. I structure every shoot around a shot list that covers the full living experience, not just the obvious rooms.
A comprehensive apartment shoot typically includes:
- Entryway — the first impression matters, even if it’s just a small foyer
- Living room — multiple angles to show layout and light
- Kitchen — wide establishing shot plus tighter details of counter space and appliances
- Dining area, if it’s distinct from the kitchen
- Primary bedroom — showing bed placement, closet access, and window position
- Secondary bedroom or home office — increasingly important for remote workers
- Bathroom(s) — clean, bright, with toilet lids down and personal items removed
- Hallway or circulation space — only if it adds value by showing flow between rooms
- Balcony, terrace, or notable view — often the deciding factor for buyers
- Laundry, storage, parking, or building amenities — practical details that matter in daily life
What we prioritize first
I always start with the rooms that carry the most weight in a buyer’s decision. The hierarchy usually looks like this:
- Living room — the emotional center of the apartment
- Kitchen — often the deal-maker or deal-breaker
- Primary bedroom — needs to feel restful and proportioned
- Main bathroom — cleanliness and light matter more than size
- Best feature — whether that’s a city view, a walk-in closet, or unexpected natural light in a compact space
In smaller apartments, the “best feature” might not be a room at all. It could be ceiling height that makes a studio feel loft-like, or built-in storage that solves the clutter problem. I make sure those details get dedicated frames, because they’re often what tips someone from “maybe” to “let’s schedule a showing.”
How we make small apartments feel true to size
Compact spaces require the most technical discipline. It’s easy to overcompensate with an ultra-wide lens and create a misleading image, or to shoot too conservatively and make the apartment feel smaller than it actually is. Neither serves the client.
My approach to tight spaces relies on a few consistent techniques:
- Shooting from corners and doorways to maximize the visible floor area and show depth
- Keeping furniture aligned and squared to the walls so the layout reads as intentional, not chaotic
- Removing anything that blocks sightlines — a tall chair back in the foreground can obscure half the room
- Including visible floor space in the foreground so the room feels like it has breathing room
- Shooting through connected spaces — a living room framed through a kitchen pass-through, for example — to show how rooms relate to each other
A narrow hallway is one of the toughest challenges. Photographed head-on from one end, it becomes a dark tunnel that makes the entire apartment feel cramped. But frame it from a doorway at a slight angle, showing where it leads and how it connects rooms, and suddenly it reads as circulation space rather than confinement. The hallway didn’t change — the perspective did.
Editing: clean, not fake
Editing should clarify what the camera captured, not invent something that wasn’t there. I treat post-production as a refinement process: balancing exposure, correcting color, and ensuring vertical lines are true. The apartment should look like the best version of its actual self — not a digitally remodeled fantasy.
The corrections I apply to nearly every frame:
- Exposure balancing — bringing window light and interior shadows into a natural range
- White balance correction — removing color casts from mixed light sources so whites read as white
- Vertical line straightening — ensuring walls, door frames, and cabinets don’t lean
- Lens distortion correction — compensating for the natural curvature of wide-angle glass
- Minor contrast and color cleanup — subtle adjustments that keep the image crisp without looking processed
What I won’t do in editing:
- Remove permanent fixtures or architectural elements
- Change the physical layout of a room
- Hide significant flaws like water damage or cracked tiles
- Over-saturate paint colors or finishes to make them “pop”
- Replace window views or digitally enlarge rooms
That last point matters more than many photographers admit. When a buyer walks into an apartment and the view from the window looks nothing like the listing photo, trust evaporates instantly. The same goes for room proportions. I’ve heard from agents who lost deals because heavily edited photos set unrealistic expectations, and the in-person visit felt like a bait-and-switch. Honest images build confidence. Confident buyers make offers.
A simple apartment shoot workflow
Over hundreds of shoots, I’ve developed a workflow that keeps me efficient without cutting corners. It’s methodical but flexible enough to adapt to each apartment’s quirks.
Step 1: Walk through the apartment
Before I touch any equipment, I walk the entire unit twice. The first pass is about light — which rooms are brightest, where the shadows fall, whether the windows face a courtyard or a brick wall. The second pass is about composition — which corners give the best sightlines, which furniture placements might block key angles, which features deserve emphasis. I make mental notes about items that need to be moved or removed, and I identify the room with the best light. That’s where I’ll start.
Step 2: Prep and style each room
I work room by room, making small adjustments that the camera will notice even if a casual observer wouldn’t. A chair angled slightly toward the window. A rug straightened so its lines parallel the floorboards. A kitchen counter cleared of everything except a single, intentional object. The key is to prep for the lens, not for the naked eye — the camera amplifies disorder in ways that surprise people.
Step 3: Start with the strongest room
Usually, this is the living room or the main open-plan area. Starting with the best light and the most important space sets the tone for the entire shoot. Once that room is captured from two or three angles, I move through the apartment in a logical sequence — kitchen, bedrooms, bathrooms, details — so the final gallery tells a coherent story.
Step 4: Shoot wide, then tighter details
Every room gets at least one wide establishing shot that shows the full layout. Then I move in for tighter frames: the texture of a backsplash, the hardware on built-in cabinets, the way light falls across a bedroom window seat. These detail shots give the gallery rhythm and help buyers remember specific features that set the apartment apart.
Step 5: Review on the spot
I review every frame on the camera’s display before I move to the next room. I’m checking for:
- Crooked verticals — the most common and most damaging mistake
- Reflections in mirrors and glass — my tripod, a light stand, or a window reflection that shouldn’t be there
- Distracting objects — a stray phone charger, a half-open closet door, a trash bin peeking into frame
- Dark corners — areas where the exposure dropped too low and detail is lost
- Window glare — blown-out patches that can’t be recovered in editing
- Visible cords or missed light switches — small elements that undermine an otherwise clean image
Step 6: Edit consistently
I edit the full gallery in one session to maintain visual cohesion. Every image should feel like it belongs to the same apartment, shot under the same conditions, with the same color temperature and exposure philosophy. Inconsistent editing — one room warm, another cool, one bright, another moody — makes the gallery feel disjointed and unprofessional.
Common mistakes that weaken apartment photos
I’ve reviewed thousands of listing photos over the years, both my own early work and images from agents who tried to shoot their own listings. The same mistakes appear again and again, and they consistently make decent apartments look worse than they are:
- Shooting before the apartment is fully cleaned — dust on surfaces, smudges on mirrors, and unvacuumed floors are magnified in photos
- Leaving blinds half-closed — the inconsistent light pattern reads as messy, not atmospheric
- Mixing color temperatures — a warm lamp in one corner and cool daylight from a window creates an unappealing color clash
- Photographing from the middle of the room — this flattens the space and shows less of it
- Overusing flash — direct flash creates harsh shadows, blows out nearby surfaces, and kills the natural ambiance
- Cropping out context — a kitchen photo that doesn’t show the relationship to the dining area misses the point
- Editing each image differently — the gallery should feel unified, not like it was shot by three different people
- Ignoring vertical lines — tilted walls make rooms feel unstable and amateurish
A single poorly composed frame can undermine an otherwise strong gallery. Buyers scan quickly, and one bad image can create a negative impression that colors how they view the rest of the listing.
Checklist: before the shoot
I use this checklist before every apartment shoot, and I share it with agents and homeowners ahead of time. The more that’s handled before I arrive, the more time I can spend on composition and light:
- Remove clutter from all visible surfaces — counters, tables, nightstands, bathroom vanities
- Hide cables, chargers, power strips, and cleaning tools
- Open all blinds and curtains fully
- Turn on every fixed light in the apartment
- Replace any blown bulbs — a dark lamp in an otherwise lit room draws the eye for the wrong reason
- Close toilet lids — an open toilet in a listing photo is surprisingly common and universally off-putting
- Make beds with smooth, even bedding — wrinkles catch light and look messy
- Put away trash bins, recycling, and all pet items
- Clean mirrors, glass surfaces, and any reflective finishes — smudges are impossible to hide in photos
- Straighten furniture, align chairs, and ensure rugs lie flat and square
- Check for reflections — stand where the camera will be and look for what mirrors and windows are catching
- Clear a path through each room so I can move equipment without rearranging furniture mid-shoot
When to bring in a pro
I’m not going to argue that every listing requires professional photography. A straightforward rental in a high-demand area might lease just fine with well-composed phone photos. But there are specific situations where professional images deliver measurable returns:
- The apartment is compact and needs precise framing to show its true proportions
- Natural light is challenging — one window, an awkward orientation, or heavy shade from neighboring buildings
- The property has premium finishes that deserve to be showcased accurately
- The listing is competing in a saturated market where buyers scroll through dozens of similar units daily
- The goal is to attract qualified buyers or renters quickly, reducing days on market and minimizing disruption to the seller or tenant
A professional brings more than a good camera. They bring an understanding of how to manage mixed light sources, how to sequence a gallery so it tells a story, and how to capture depth in spaces that feel flat to the untrained eye. That expertise translates directly into faster showings and stronger offers.
FAQ
How many photos should an apartment listing include?
There’s no fixed number, but the gallery should cover every significant space and any feature that helps someone understand the apartment. Core rooms — living room, kitchen, bedrooms — typically need two to three angles each to show both layout and detail. A studio might need twelve images; a three-bedroom with a balcony and views might need twenty-five. The guiding principle is completeness, not volume.
What is the best time to photograph an apartment?
Late morning to early afternoon, roughly 10 a.m. to 2 p.m., provides the most consistent natural light for most apartments. The exact window depends on the unit’s orientation — east-facing rooms peak earlier, west-facing rooms need the afternoon. I always confirm orientation before scheduling a shoot.
Should blinds be open or closed for apartment photos?
Open, almost without exception. Open blinds and curtains maximize natural light, make rooms feel brighter, and often reveal a view that adds value to the listing. The only time I’ll partially close blinds is when direct sunlight is creating unmanageable contrast that can’t be balanced through exposure techniques.
Can apartment photos be taken with a smartphone?
Yes, and modern phone cameras are remarkably capable in good light. The limitations show up in mixed lighting, tight spaces, and high-contrast scenes. A tripod becomes even more important with a phone — handheld shots in interiors almost always show motion blur or tilted horizons. Careful composition and level framing matter more than the device you’re using.
Is it okay to use flash indoors?
I rarely use flash in apartment interiors. Direct flash creates harsh, unnatural shadows, blows out nearby surfaces, and kills the ambient light that makes a room feel inviting. Natural light combined with the apartment’s own fixed lighting almost always produces a more authentic, appealing result. If I need to lift shadows in a particularly dark corner, I’ll bracket exposures and blend them in post rather than introduce flash.
Final thoughts
Photographing an apartment well isn’t about imposing a style or forcing a narrative. It’s about understanding the space on its own terms — where the light lives, how the rooms connect, what makes the layout work for daily life — and translating that into images that feel honest and inviting.
The apartments that photograph best aren’t necessarily the largest or the most expensive. They’re the ones where someone took the time to prepare thoughtfully, where the angles were chosen with intention, and where the editing stayed true to the actual space. When those elements come together, the photos don’t just document the apartment — they communicate its potential. And in a market where buyers make split-second decisions based on what they see on a screen, that communication is everything.