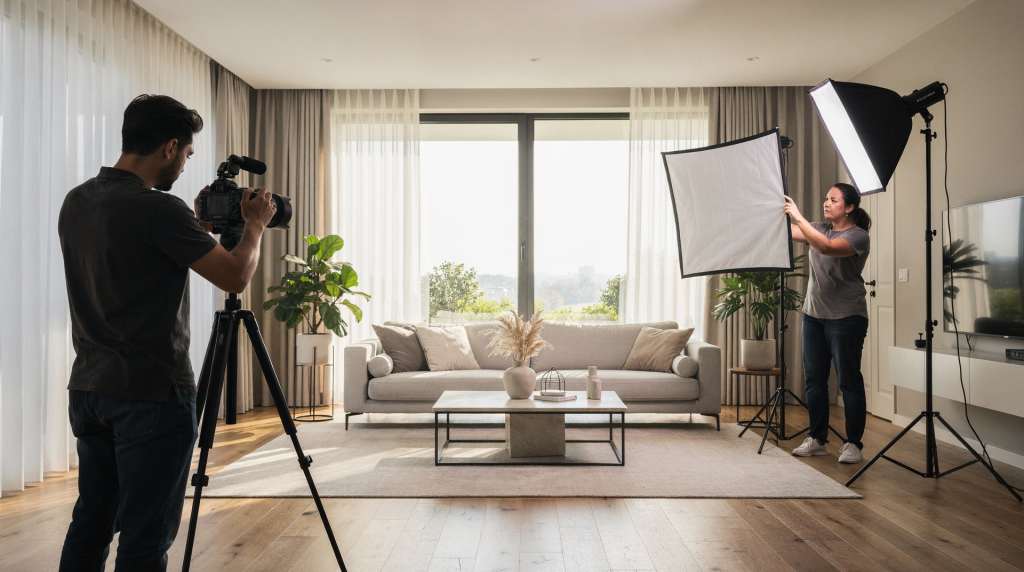
A strong property photo shoot looks effortless in the final gallery, but the real work happens long before the camera comes out. The best residential images are built through planning, staging, light control, and a shooting order that protects both time and quality. Over the years, I’ve learned that the difference between a listing that sits and one that moves often comes down to how intentionally those behind‑the‑scenes decisions are made.
This guide walks through what actually happens on a residential property shoot, why each step matters, and how agents and homeowners can prepare for better listing photos — without falling into the traps I see repeatedly on real estate sites.
What a residential property photo shoot is really trying to do
The goal is not just to “take nice pictures.” It is to help a buyer understand the home quickly and emotionally. When I transitioned from commercial portraiture into architectural work, I had to unlearn the habit of chasing a single striking image. A listing gallery is a sequence — it needs to build trust and answer spatial questions before a buyer ever sets foot inside.
A useful listing gallery should:
- show the layout clearly
- make rooms feel bright and open
- highlight the home’s strongest features
- reduce distractions
- create a sense of trust by matching the photos to reality
That last point matters more than many sellers realize. Good real estate photography should flatter the property without misrepresenting it. If the photos look dramatically different from the actual home, buyers lose confidence fast. I’ve walked into properties where the wide‑angle shots made a living room feel twice its size, and you could see the disappointment on the clients’ faces. The goal is to show the space honestly, just at its most composed and well‑lit.
The shoot starts before the camera comes out
Most of the work is done in the walkthrough. Before shooting, I like to move through the property and identify three things:
- where the light is strongest
- which rooms are likely to be the key selling points
- what needs to be removed, adjusted, or hidden
This first pass saves time later. It also prevents the common mistake of photographing a room before the space is truly ready. I’ve made that error early in my career — setting up a tripod in a kitchen only to realize the counter was still cluttered with mail and appliances. Now, the walkthrough is non‑negotiable. It’s where I decide the narrative of the home: which room leads the story, and how the light will guide the viewer through it.
What is checked during the walkthrough
- Window direction and daylight quality
- Burned‑out bulbs or inconsistent color temperatures
- Clutter on counters, floors, and tables
- Mirrors, TV screens, and reflective surfaces
- Personal items that make the home feel less universal
- Angles that show the room’s shape instead of collapsing it into a flat image
If a home is listed with a kitchen, living room, primary bedroom, bathrooms, and exterior shots, those are usually the priority. The rest of the house supports the story. I’ll often spend an extra minute in the primary suite checking how the bed relates to the windows — a slight shift in angle can turn a cramped‑feeling bedroom into a restful retreat.
How the house should be prepared before the session
Preparation changes everything. A clean, simple space photographs larger and calmer than a crowded one. I’ve shot homes where the owner spent hours cleaning, but left a bright‑colored child’s toy in the corner of the living room — and that became the unintended focal point of the hero shot. The camera sees clutter more ruthlessly than the human eye.
Pre‑shoot checklist for homeowners
- Remove trash bins, cleaning supplies, and pet items
- Clear kitchen and bathroom counters
- Hide cords, remotes, and chargers
- Replace dead light bulbs
- Open curtains and blinds
- Turn on lights that match the room’s color tone
- Make beds with crisp, simple bedding
- Straighten rugs, chairs, and decor
- Clean mirrors, glass, and stainless steel surfaces
- Put toilet seats down
- Park cars away from the front of the home if possible
- Improve curb appeal by sweeping, trimming, and removing clutter
The cleanest room is not always the best room to photograph first, but it is usually the easiest to work with. I always tell sellers: if you have to choose between deep‑cleaning the oven and clearing the kitchen counters, clear the counters. The camera won’t see inside the oven, but it will absolutely notice a toaster, knife block, and pile of mail.
Lighting: the difference between average and strong listing photos
Lighting is usually the biggest factor separating amateur‑looking photos from professional ones. Real estate photos work best when the home feels bright, even, and natural. My background in portrait lighting taught me how to read the quality of light — hard shadows, soft fill, color temperature shifts — and that sensitivity translates directly into architectural work, where a room can look cold and uninviting simply because of a mismatched bulb.
Best lighting approach for interiors
- Use natural light whenever possible
- Keep lighting consistent from room to room
- Avoid heavy mixed lighting from daylight, yellow lamps, and harsh overhead fixtures all at once
- Turn off lights that create ugly color shifts or hot spots
- Avoid direct flash unless it is being controlled very carefully
A common mistake is shooting directly into a bright window. That often blows out the view and makes the room feel darker than it really is. A better approach is to angle the camera so the room stays readable and the windows still contribute light instead of overwhelming the frame. In practice, I’ll often bracket exposures and blend them later — capturing one frame for the interior, one for the window view — to preserve detail in both without the room feeling artificially lit. But even with blending, the starting composition has to respect the window’s brightness.
Best time to shoot
For interiors, daylight is usually the safest choice. Bright overcast conditions can work well because the light is softer and more even — it wraps around furniture without casting harsh shadows. For exteriors, early morning or late afternoon often produces a warmer, more inviting result. I’ve rescheduled entire shoots around a forecast because the difference between a flat, midday front elevation and one kissed by golden‑hour light can be the difference between a drive‑by and a booked showing.
The camera setup behind the scenes
Most real estate photography depends on control, not creativity for its own sake. The setup is designed to keep lines straight, spaces open, and exposure balanced. I shoot with a full‑frame body and a tilt‑shift lens when possible, but even with a standard wide zoom, the principles remain the same.
Common camera choices and settings
| Choice | Why it matters |
|---|---|
| Tripod | Keeps images sharp, level, and consistent |
| Wide‑angle lens | Shows more of the room without making it feel cramped |
| Landscape orientation | Fits rooms and property listings better |
| Chest or waist‑height camera position | Matches natural buyer eye level |
| Vertical line correction | Prevents walls from leaning and looking distorted |
A wide‑angle lens helps show the room, but too much width can stretch corners and furniture. That is why composition matters as much as gear. I often see agents using a 10mm lens on a crop sensor, and the resulting images make a modest bedroom look like a bowling alley — technically wider, but spatially dishonest. I prefer a focal length that feels natural to the eye while still revealing the room’s volume.
Composition: how to make a room feel larger and more useful
A good property photo does more than show furniture. It helps a buyer understand how the room flows. When I first started, I’d frame every shot symmetrically from the doorway. Over time, I learned that a slight offset reveals depth and makes the space feel more navigable.
Practical composition rules
- Stand in corners or doorways to reveal two or three walls
- Use angles that show depth, not just a flat front view
- Keep vertical lines straight
- Leave some breathing room around major furniture
- Avoid cutting off key features like fireplaces, islands, or windows
- Show how rooms connect when the layout matters
A helpful rule is to shoot the room the way a buyer would experience it: entering, turning, and seeing the space open up. That is more useful than forcing every photo into the same symmetrical formula. For example, in an open‑plan living area, I’ll often position the camera so the kitchen island leads the eye toward the dining table and then the sofa — a visual path that suggests how the home lives.
A typical shoot order for a residential property
Shooting in the right order reduces backtracking and protects the best light. I’ve learned to treat the schedule like a lighting script: exteriors first if the sun is cooperating, then move inside as the day progresses.
Recommended sequence
- Exterior front
- Entryway
- Main living areas
- Kitchen
- Dining area
- Primary bedroom
- Primary bathroom
- Secondary bedrooms
- Shared bathrooms
- Special features
- Backyard, patio, or balcony
- Garage or utility spaces if relevant
Exterior photos are often best captured when the light is favorable, so they may be shot earlier or later depending on the time of day. I’ll frequently start with the front exterior at 8 a.m., then move inside, and return to the backyard in the late afternoon when the light softens. This kind of flexibility keeps the gallery cohesive without forcing a flat, unflattering light on key selling points.
Behind the scenes: what gets fixed in the room before each frame
A polished image often comes from small adjustments that take only a minute. These are the details that separate a rushed shoot from a professional one. I carry a small kit for on‑set tweaks: a microfiber cloth for fingerprints on stainless steel, a few neutral‑colored throw pillows to replace overly bold ones, and a roll of gaffer tape for securing stray cords.
Common on‑set adjustments
- Straighten pillows and bedding
- Move bar stools into clean alignment
- Rotate chairs to open the room
- Hide toilet brushes and trash cans
- Close cabinet doors
- Turn on accent lights if they add warmth
- Remove decorative items that crowd surfaces
- Adjust blinds to balance view and brightness
These changes may seem minor, but they affect how spacious and well cared for the home feels. I once spent 30 seconds removing a single bright‑orange extension cord from a hallway floor — without it, the corridor looked longer and more serene. Buyers may never know what was removed, but they’ll feel the difference.
Interior vs. exterior priorities
Interior photos and exterior photos serve different purposes. Interiors sell the lifestyle; exteriors sell the first impression. I treat them as two distinct narratives that must still feel like the same home.
| Type | Main goal | Common mistakes |
|---|---|---|
| Interior | Make rooms feel bright, spacious, and functional | Mixed lighting, clutter, crooked verticals |
| Exterior | Show curb appeal and neighborhood context | Shooting straight‑on with no depth, harsh midday light, messy landscaping |
Exterior images should usually include enough angle to show depth. A flat front view often feels less inviting than a slightly offset perspective that reveals shape and dimension. I’ll often walk to the side of the driveway and shoot back toward the entrance, capturing the porch, landscaping, and a sliver of the street — that tells a richer story than a dead‑on elevation.
Typical mistakes that weaken residential property photos
Even well‑staged homes can photograph poorly if the process is rushed. I’ve seen agents with excellent listings lose buyer interest simply because they tried to shoot the entire property in 20 minutes with a smartphone and no tripod.
Common mistakes
- Shooting too high or too low
- Using a flash that creates unnatural shadows
- Ignoring vertical alignment
- Leaving personal items in view
- Overediting until the home no longer looks real
- Photographing at the wrong time of day
- Trying to show too much in one frame
- Skipping detail shots that support the main story
The biggest issue is usually not the camera. It is the lack of a plan. Without a walkthrough and a shot list, you end up reacting instead of directing the visual story. That’s when you get crooked walls, blown‑out windows, and a gallery that feels chaotic rather than curated.
A simple behind‑the‑scenes workflow for agents and homeowners
Over time, I’ve refined a repeatable workflow that keeps quality high and stress low. It’s designed to be adaptable whether you’re working with a professional photographer or tackling the shoot yourself.
Step‑by‑step process
- Walk through the property and identify strengths and problem areas
- Declutter and clean every room
- Open blinds, curtains, and interior doors
- Turn on selected lights for consistency
- Set the most important rooms first
- Shoot wide establishing images
- Add detail and feature shots
- Review the frames for straight lines, exposure, and distractions
- Re‑shoot any room that feels dark, cluttered, or incomplete
- Edit lightly so the home still looks accurate
I always review images on a larger screen before leaving the property, even if it’s just a laptop. A tilted vertical or a reflection in a mirror is easy to miss on a small camera LCD, but glaringly obvious on a listing site.
How to know if the shoot is working
A good listing gallery should pass a few simple checks. I use these as a mental checklist before packing up:
- Can a buyer understand the room at a glance?
- Does the home look bright without feeling fake?
- Are the walls and cabinets straight?
- Is there anything in the frame that distracts from the property?
- Do the photos feel consistent from room to room?
- Would a buyer arrive expecting the same home they saw online?
If the answer to any of these is no, the shoot needs adjustment before it is published. I’ve re‑shot entire rooms because a single crooked lampshade or a half‑closed blind undermined the sense of care. It’s always worth the extra ten minutes.
FAQ
How long does a residential property photo shoot take?
It depends on the size and condition of the home, but the more prep work done in advance, the faster and cleaner the session usually goes. A typical 2,000‑square‑foot home might take two to three hours when properly prepared. Without prep, that can double — and the results still suffer.
Should every room be photographed?
Not always. Prioritize the rooms that help sell the home: main living areas, kitchen, primary suite, bathrooms, and any standout features. A cramped laundry room or a cluttered home office rarely adds value unless they are exceptional. I’d rather have 15 strong images than 40 mediocre ones.
Do all lights need to be on?
No. The goal is consistency, not maximum brightness. Some lights help warm the room, while others can create color problems or glare. I often turn off overhead fluorescents in kitchens and rely on under‑cabinet LEDs and window light instead — it feels more natural and avoids green color casts.
Is wide‑angle photography always better?
No. Wide‑angle lenses help show space, but overuse can distort proportions. The best results come from using them carefully and positioning the camera well. I’ve seen listing photos where a queen‑sized bed looked like a king because the wide angle stretched the foreground. Buyers notice, and it erodes trust.
What should homeowners fix before the photographer arrives?
The biggest wins are decluttering, cleaning, opening up light, removing personal items, and making the home feel calm and open. Think of it as creating a blank canvas: family photos, bold artwork, and refrigerator magnets all pull attention away from the architecture.
Conclusion
A residential property photo shoot is a controlled process, not a quick snapshot session. The strongest results come from preparation, light awareness, careful composition, and a clear shooting order. When the home is clean, the lighting is balanced, and the camera is placed with intention, the final gallery does more than document the property. It helps buyers picture themselves living there — and that emotional connection is what turns a listing into a sale.