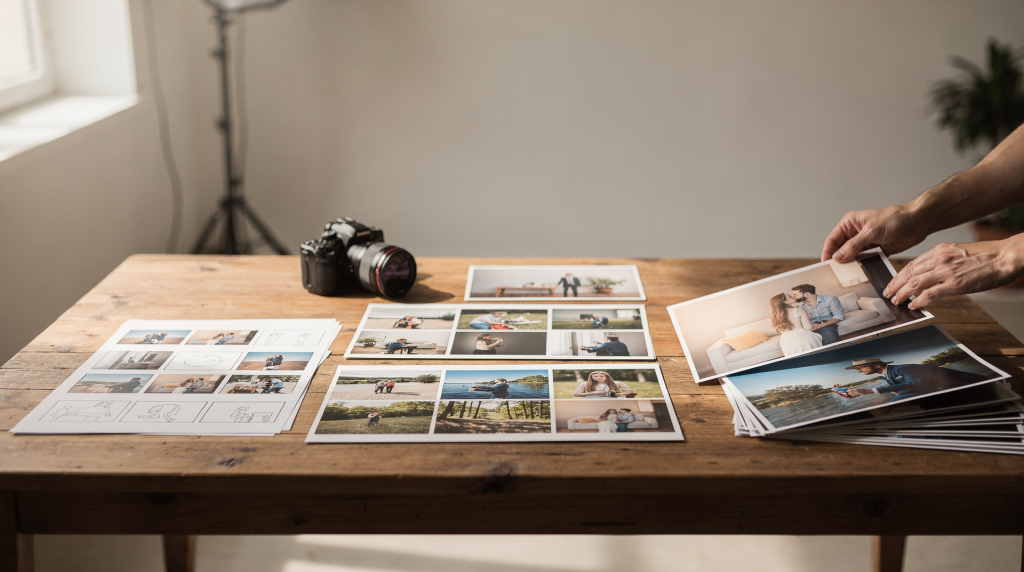
A strong real estate gallery does not happen by accident. It is the result of a clear workflow that starts with the client brief, moves through planning and shooting, and ends with careful editing and delivery. When every step is deliberate, the final images feel consistent, polished, and ready to help a property stand out.
Why workflow matters in property photography
A good workflow saves time, reduces mistakes, and creates a repeatable standard across every shoot. It also helps agents and homeowners understand what happens behind the scenes, which builds trust and sets realistic expectations.
In real estate photography, the goal is not just to make rooms look bright. The goal is to show space accurately, guide attention to the best features, and remove distractions without making the images feel artificial. I’ve walked into too many listings where the agent’s own phone photos made a 200-square-foot living room look like a cramped corridor — not because the room was small, but because the process had no structure. A defined workflow prevents that disconnect between what the space actually offers and what the buyer perceives online.
The full workflow at a glance
| Stage | Main goal | Typical output |
|---|---|---|
| Briefing | Understand the property, target buyer, and listing goals | Shoot plan, shot list, timing notes |
| Pre-shoot prep | Make the home ready for camera work | Decluttered rooms, cleaned surfaces, staged details |
| Capture | Photograph each space with consistency | RAW files, bracketed exposures, detail shots |
| Culling | Select the strongest frames | Shortlisted images for editing |
| Editing | Correct exposure, color, perspective, and distractions | Final retouched gallery |
| Delivery | Export files in the right format and size | MLS-ready and marketing-ready images |
Step 1: Start with the brief
Every shoot should begin with a short but focused brief. This is where the workflow becomes specific to the property instead of generic. Without it, you’re essentially walking into a space blind, hoping the right shots will present themselves. They rarely do.
What we confirm before the shoot
- Property type: apartment, single-family home, rental, commercial space, or luxury listing
- Purpose of the images: MLS, website, social media, print, or Airbnb
- Priority rooms and features: kitchen, primary suite, view, outdoor area, office, amenities
- Timing: best light, occupancy status, and access window
- Styling level: occupied, lightly staged, or fully staged
- Delivery expectations: number of images, turnaround time, and crop versions
Why this step matters
A city apartment and a large suburban home need different coverage. A small rental may need stronger composition and cleaner styling, while a high-end home may require more attention to window views, symmetry, and detail shots. The brief prevents wasted time on site and reduces the chance of missing the images that matter most. I’ve learned this the hard way: early in my transition from portraiture, I once spent twenty minutes perfecting a hallway shot in a condo, only to realize later that the agent needed the balcony view for the listing’s hero image. A five-minute conversation beforehand would have reordered my entire shoot.
Step 2: Prepare the property before camera work
The camera exposes everything, including clutter that people stop noticing in daily life. That is why preparation has such a large impact on final image quality. When I arrive at a property and see kitchen counters covered with mail, appliances, and spice racks, I know we’re about to lose thirty minutes of shooting time just clearing surfaces. The lens doesn’t forgive — it amplifies.
Room prep checklist
- Remove trash cans, dish racks, cords, pet items, and personal toiletries
- Open blinds and curtains consistently across rooms
- Turn on all matching light sources
- Wipe reflective surfaces
- Make beds neatly and straighten pillows
- Hide cleaning products, spare chairs, and countertop clutter
- Align furniture so the room feels balanced
- Replace blown bulbs and unbalanced color temperatures
Common prep mistakes
- Leaving too many small items on counters
- Mixing warm and cool bulbs in the same room
- Forgetting mirrors and glass doors
- Over-staging a room so it feels cramped
- Ignoring outdoor details like bins, hoses, or cars in the driveway
Good prep does not mean making a home look fake. It means removing visual noise so buyers can read the space quickly. One of the most common pushbacks I hear from homeowners is that they want the place to look “lived-in.” But lived-in reads as cluttered through a 16mm lens. A single phone charger on a nightstand becomes a black snake in the frame. A stack of mail on the kitchen island blocks the sightline to the backsplash. The goal is to present a clean canvas that lets the architecture speak.
Step 3: Shoot with consistency and intention
The shooting stage is where visual discipline matters most. Every angle should support the same story: this home is bright, spacious, and worth exploring. I approach each room methodically, working from a tripod at a fixed height — usually around chest level — to maintain a natural perspective that doesn’t distort the viewer’s sense of scale.
Core shooting principles
- Keep the camera level to avoid leaning walls
- Use consistent height from room to room
- Show depth by including multiple walls when possible
- Capture from corners or strong sightlines to reveal layout
- Avoid cutting off key features such as windows, fireplaces, or built-ins
- Shoot both wide context shots and tighter detail frames
Typical capture order
- Exterior front
- Entry and foyer
- Main living areas
- Kitchen
- Bedrooms
- Bathrooms
- Hallways and transition spaces
- Outdoor areas, views, and amenities
- Detail images for standout features
Why exposure bracketing is often used
Interior spaces often contain dark corners and bright windows in the same frame. Bracketing gives multiple exposures of the same scene, which makes it easier to create a balanced final image later. It helps preserve window detail while keeping the room naturally visible. I typically shoot three to five brackets at two-stop intervals, depending on the contrast range. A room with floor-to-ceiling windows on a sunny day might need five frames to hold detail in both the view and the shadowed interior walls. Without bracketing, you’re forced to choose between a blown-out window or a murky room — neither of which sells the property.
Step 4: Cull ruthlessly
Culling is the process of selecting the best frames and deleting the rest. It is one of the most important parts of the workflow because it controls the quality of the final gallery. This is also where I see less experienced photographers hesitate. They keep near-duplicates because they’re afraid of missing something. But a gallery of forty images with twelve variations of the same living room angle doesn’t help anyone — it exhausts the viewer.
What makes a frame a keeper
- Straight verticals
- Clean composition
- Good light balance
- No motion blur
- No distracting object in the frame
- Strong coverage of the room
- A natural perspective that feels comfortable to the eye
What gets rejected
- Slightly soft images
- Duplicate angles with weaker composition
- Frames with awkward crop edges
- Exposures with blown highlights or heavy shadows
- Shots where doors, blinds, or fans create distractions
A smaller gallery is often better than a bloated one. Clients usually want clarity and usefulness, not volume. When I deliver a set of eighteen images that each show something distinct, the agent can build a listing narrative. When I deliver fifty, they’re overwhelmed and often pick the wrong hero shot.
Step 5: Edit for realism, not exaggeration
Editing is where the gallery becomes polished, but restraint matters. The best real estate editing improves clarity without making the property feel misleading. I’ve seen editing trends come and go — the over-saturated HDR look of the early 2010s, the desaturated gray-wash that followed, the recent wave of sky replacements that turn a modest suburban home into a Malibu beach house. Buyers notice when something feels off, even if they can’t articulate why.
The main editing tasks
| Task | What it fixes | Why it matters |
|---|---|---|
| White balance correction | Color casts from mixed lighting | Keeps walls and finishes looking natural |
| Exposure balancing | Dark rooms and bright windows | Makes the space easy to read |
| Perspective correction | Leaning walls and tilted lines | Improves trust and visual structure |
| Lens correction | Distortion and edge warping | Keeps geometry clean |
| Retouching | Small distractions, spots, cords | Reduces visual noise |
| Cropping | Weak framing or awkward edges | Tightens composition |
A practical editing order
- Import and organize files
- Select the strongest frames
- Apply lens and perspective corrections
- Balance exposure and white balance
- Merge brackets if needed
- Retouch distractions
- Fine-tune contrast, shadows, and highlights
- Check consistency across the full gallery
- Export in the correct sizes and formats
A note on realism
If the image no longer matches the room in a believable way, the edit has gone too far. Buyers want a polished view of the property, not a fantasy version of it. That is especially important for kitchens, bathrooms, window views, and room size. I once had a homeowner ask me to make their galley kitchen look twice as wide. I explained that while I could stretch the perspective slightly, any buyer who walked through the door would immediately feel misled — and that feeling of distrust would poison the entire showing. The photos should invite, not deceive.
Step 6: Build consistency across the gallery
A strong gallery feels unified. That means the images should look like they belong to the same property session, even if they were shot at different times or in different lighting. This is where the editing stage really proves its value. A bedroom shot at 9 a.m. with soft eastern light shouldn’t look like a different house from the kitchen shot at noon under overhead fluorescents.
Consistency checks before delivery
- Similar brightness from image to image
- Matching white balance across rooms
- Straight verticals throughout the set
- No over-sharpened or over-saturated frames
- Balanced sequencing, from exterior to interior to detail shots
- Correct aspect ratios for each platform
When galleries feel inconsistent, the property can look less professional even if each individual image is good. I review every gallery as a whole before sending it out, scrolling through the sequence as a buyer would. If a bathroom image suddenly jumps in brightness or shifts color temperature, I go back and adjust. The goal is a seamless visual flow that guides the viewer through the home without jarring interruptions.
Step 7: Export for the correct use case
Delivery is more than sending files. Different platforms need different sizes and formats, and the workflow should account for that before export. An MLS requires specific dimensions and file sizes; Instagram wants a vertical crop; a print brochure demands higher resolution and a different color profile. Getting this wrong creates unnecessary back-and-forth with the client.
Common delivery formats
| Use case | Recommended output |
|---|---|
| MLS listing | JPEG, sRGB, platform-specific dimensions |
| Website gallery | High-quality JPEG, web-optimized size |
| Social media | Cropped versions for square or vertical layouts |
| Higher-resolution files, often larger than web versions | |
| Client archive | Full final gallery with clear filenames |
Delivery best practices
- Use descriptive file names
- Keep room order logical
- Deliver a mix of wide shots and detail images
- Include alternate crops if requested
- Make the download process simple for the client
Common workflow mistakes and how to avoid them
1. Starting editing before culling
This wastes time and leads to inconsistent work. Always shortlist first. I’ve watched photographers spend ten minutes tweaking an image only to realize later that the next frame in the sequence was sharper and better composed. Cull first, edit second — no exceptions.
2. Fixing bad composition in post
Editing can improve a photo, but it cannot fully rescue a weak angle. Better capture beats heavy correction. A crooked horizon or a cut-off fireplace can’t be truly fixed in Lightroom. The time to adjust composition is when you’re standing behind the camera, not sitting at the computer.
3. Overusing effects
Heavy HDR, extreme saturation, or artificial-looking sky replacements can reduce credibility. Buyers are visually literate now — they scroll through dozens of listings a day. They can spot a fake sky or an over-processed interior instantly, and it makes them question what else about the listing might be exaggerated.
4. Ignoring the sequence of images
A gallery should tell a visual story. Random ordering makes even good photos feel less effective. I always sequence from exterior to entry to main living spaces, then private areas, then details. It mirrors the experience of walking through the home and helps buyers build a mental map of the layout.
5. Delivering the wrong file type
Sending files in the wrong size or format creates friction for the client and can delay the listing launch. I’ve had agents call me in a panic because the MLS rejected their upload due to file dimensions. A quick export preset solves this, but only if it’s part of the standard workflow.
Workflow example: how a typical residential shoot moves from brief to gallery
Example timeline
- Day 1: receive brief and confirm shot list
- Day 2: prepare the property and check weather/light conditions
- Shoot day: capture exteriors, interiors, and detail images
- Same day or next day: cull and edit the keepers
- Delivery day: export final gallery and send files in the agreed format
What this looks like in practice
For a two-bedroom apartment, the brief may prioritize the living room, kitchen, primary bedroom, and balcony. The shoot may take less than two hours, but editing still needs time for straightening, exposure balancing, and cleanup. The final gallery might contain 15 to 25 carefully selected images instead of 40 similar frames. I recently shot a compact urban condo where the agent initially wanted “as many photos as possible.” After culling, we landed on 19 images that showed every meaningful angle without repetition. The listing went live on a Thursday, and by Monday they had three offers. The agent told me later that buyers commented specifically on how easy it was to understand the layout from the photos — that’s the workflow paying off.
What clients should expect from a professional workflow
A professional workflow should feel organized, predictable, and easy to follow. Clients should know what to prepare, when the shoot happens, how long delivery takes, and what the final gallery will include. When I send a prep checklist ahead of time and the homeowner follows it, the shoot day is smooth and the images turn out stronger. When they don’t, we spend valuable shooting time moving furniture and hiding personal items — and it shows in the final gallery.
Signs the workflow is working well
- The property is easy to prepare
- The shoot moves quickly without confusion
- The images feel consistent
- The final gallery highlights the home’s strengths
- The delivered files are ready to use immediately
Checklist: from brief to final gallery
- Confirm the goal of the shoot
- Identify priority spaces and features
- Prepare the property before arrival
- Capture clean, level, well-lit frames
- Cull out weak or duplicate images
- Edit for realism and consistency
- Export in the right formats and sizes
- Deliver a gallery that matches the listing’s needs
FAQ
How long does a real estate photography workflow usually take?
The shoot itself may take one to three hours depending on property size, while editing and delivery can take several more hours or the next business day. A 3,000-square-foot home with multiple outdoor areas and detailed staging will naturally take longer than a vacant studio apartment. I always build in buffer time for unexpected conditions — a room that needs extra decluttering, a cloudy morning that delays exterior shots, or a mirror that reflects the camera setup and requires a different angle.
Do all properties need the same workflow?
No. An occupied condo, a vacant house, and a luxury home with views all need different shot priorities and editing attention. A vacant property, for example, often requires more careful composition to avoid the “empty box” feel — I might shoot slightly lower to emphasize floor texture or include more ceiling detail to give the space dimension. An occupied home needs more prep coordination with the residents. The core workflow stages remain the same, but the emphasis shifts depending on what the property demands.
Why not just deliver every photo from the shoot?
Too many similar images make the gallery harder to use. Culling improves clarity and keeps the final selection strong. I’ve tested this with agents: when I deliver a tight gallery of twenty images, they use eighteen of them. When I deliver fifty, they use maybe twenty-five and the rest sit unused, cluttering their file system and making it harder to find the best shots.
Is heavy editing a good idea for listing photos?
No. Editing should improve clarity, color, and balance while keeping the property believable. The moment a photo looks like it belongs in a video game rather than a real home, you’ve lost the buyer’s trust. I focus on correcting what the camera couldn’t capture perfectly in a single frame — dynamic range, color casts, lens distortion — and leave the rest alone.
What matters most: shooting or editing?
Both matter, but a strong capture always makes editing easier and better. Good workflow starts on site, not at the computer. A well-composed, properly exposed RAW file needs minimal adjustment. A poorly shot frame with crooked lines and mixed lighting will never look right, no matter how much time you spend in post. I’d rather spend an extra five minutes on site getting the angle perfect than thirty minutes at my desk trying to salvage a rushed shot.
Final thoughts
The best photography workflow is simple to follow but strict in execution. A clear brief, careful preparation, disciplined shooting, selective culling, and restrained editing all work together to produce a gallery that feels polished and trustworthy. When the process is consistent, the final images do more than look good — they help the property sell itself. Over years of shooting everything from compact rentals to sprawling estates, I’ve found that the properties that sell fastest aren’t always the most expensive or the best-located. They’re the ones where the photos make it effortless for a buyer to imagine living there. That doesn’t happen by chance. It happens when every step of the workflow is treated as essential, not optional.