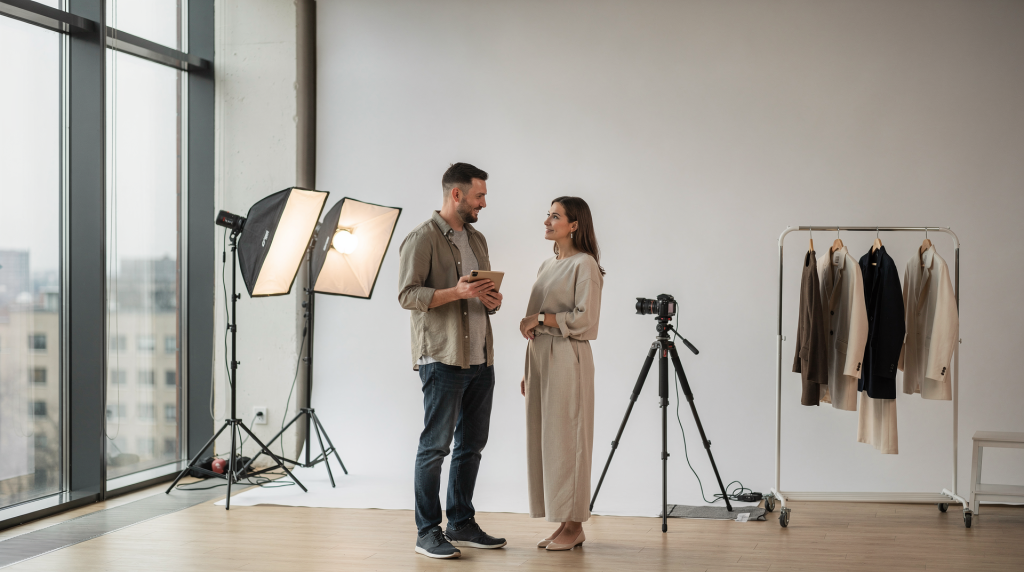
A strong portrait session does not happen by accident. It starts long before the camera comes out, with clear goals, smart logistics, and simple preparation that helps the subject look confident and natural in front of the lens.
This guide breaks down the exact way a professional portrait session is planned from start to finish, so the final images feel polished, intentional, and usable for their real purpose.
Why Session Planning Matters
A portrait is not just a nice photo. It usually has a job to do: update a LinkedIn profile, support a personal brand, refresh a company website, or create a set of images for marketing and media use. If the session is poorly planned, the results often feel generic, rushed, or inconsistent.
I learned this the hard way early in my career. When I was still doing corporate headshots back-to-back, the sessions that fell flat were almost never about the camera settings. They failed because nobody clarified what the images were actually for. A CFO who needs a boardroom portrait requires completely different framing, expression, and background than a startup founder who wants something approachable for their About page. Without that clarity, you end up with safe, forgettable images that don’t serve anyone.
Good planning solves the most common problems:
- Unclear expectations
- Wardrobe mistakes
- Bad timing and poor light
- Awkward posing because the subject feels unprepared
- Inconsistent image style
- Extra retouching work later
The goal is simple: reduce friction before the shoot so the actual session is calm, efficient, and productive. When I walk into a session with a clear brief, I can focus entirely on light, composition, and expression instead of solving problems that should have been handled days earlier.
Step 1: Define the Purpose of the Portraits
Every planning decision starts with the end use. A corporate headshot, an editorial portrait, and a personal branding session all need a different approach.
This is the foundation that supports every other choice. I’ve had clients come in wanting “just a nice photo,” and when I ask where it’ll live, they realize they need a square crop for Instagram, a horizontal header for their website, and a vertical headshot for LinkedIn. Three different compositions from one session. If I don’t know that upfront, I might shoot everything tight and centered, then discover in post that nothing works for their website banner.
Ask these questions first
- Where will these photos be used?
- What do the images need to communicate?
- Do they need to feel formal, approachable, creative, or premium?
- Will the session produce one hero image or a full set of variations?
- Does the client need vertical, horizontal, or square crops?
When the purpose is clear, everything else becomes easier: location, wardrobe, posing, lighting, and final delivery.
Common portrait types and how they differ
| Portrait type | Main goal | Planning focus |
|---|---|---|
| Corporate headshot | Professional trust | Clean background, simple wardrobe, consistent expression |
| Personal branding | Personality + authority | Multiple looks, varied poses, brand colors, location variety |
| Editorial portrait | Strong visual story | Mood, composition, lighting contrast, more creative direction |
| Family or lifestyle portrait | Warmth and connection | Movement, relaxed posing, comfortable environment |
Step 2: Build a Simple Pre-Session Brief
A good session brief prevents confusion. It does not need to be long, but it should be specific.
I keep mine to one page. Busy professionals don’t read three-page documents — they scan. So I make every line count. The brief becomes our shared reference point, and when a client asks a question that’s already answered there, I can point them back to it without friction.
Include these basics
- Session date and time
- Exact location and meeting point
- Purpose of the portraits
- Image style references
- Wardrobe guidance
- Hair and makeup notes
- Expected duration
- Final deliverables
- Turnaround time
If the client is busy, send this as a clean one-page summary. Keep it scannable.
What to clarify early
- Who is approving the final look?
- Are there brand colors to match?
- Will the portraits be used across multiple platforms?
- Is retouching expected to stay natural or more polished?
- Are there accessibility or mobility concerns?
The earlier these details are handled, the fewer surprises later. I once shot a full branding session only to learn afterward that the client’s marketing director had final approval — and she wanted a completely different background color. Now I ask about approval chains before I book the date.
Step 3: Choose the Right Location
Location is one of the biggest visual decisions in a portrait session. It affects the mood, the background, the light, and how relaxed the subject feels.
In my experience, the best locations are often the simplest ones. A plain wall with good light beats a dramatic backdrop that pulls attention away from the person. I’ve shot executive portraits in empty conference rooms that looked stunning because the light was soft and the background was intentionally minimal. Meanwhile, a rooftop with a skyline view created so much visual competition that the subject got lost.
Location options
- Studio
- Office or workplace
- Outdoor urban setting
- Natural light interior
- Home environment
How to choose well
A good portrait location should support the subject, not distract from them. Look for:
- Clean visual backgrounds
- Enough space to move and pose
- Reliable light
- Low noise and low interruption
- Easy access for the subject
If the location has too much clutter, strong color distractions, or unpredictable light, the final images will take longer to shoot and edit.
Location checklist
- Check natural light at the planned time
- Identify any harsh shadows or reflective surfaces
- Look for background clutter
- Confirm parking and building access
- Check whether permits or permission are required
- Plan a backup option in case of weather or access issues
I always scout locations at the same time of day the session will happen. Light behaves differently at 9 AM versus 2 PM, and a wall that looks clean in morning light might have harsh reflections by early afternoon. This is the same discipline I bring to architectural shoots — you can’t trust your assumptions about light until you see it in person.
Step 4: Plan Timing Around Light and Energy
Timing affects more than exposure. It also affects expression, posture, and energy.
I’ve photographed enough people to know that a tired subject cannot fake alertness. The slight tension around the eyes, the slower response to direction, the subtle slump in posture — it all reads on camera. That’s why I schedule sessions when the subject is naturally at their best, not when it’s convenient for my calendar.
Best timing principles
- Schedule when the subject is least rushed
- Leave buffer time for traffic and setup
- Avoid late-day fatigue if the subject needs to look fresh and alert
- Use soft, flattering light whenever possible
For outdoor portraits, the hour after sunrise or before sunset often gives softer light and gentler shadows. For indoor portraits, the best time is usually when the room gets the most even daylight and distractions are lowest.
Why buffer time matters
If the session starts late, the subject arrives tense. That tension shows in the face, shoulders, and hands. A 15-minute buffer can save the whole session from feeling rushed. I build buffers into every session now, and I treat them as non-negotiable. The few times I’ve skipped this step, I regretted it within the first five minutes.
Step 5: Guide Wardrobe Choices Early
Wardrobe can help a portrait feel polished or ruin it completely. The right clothes should support the person, not overpower them.
I tell clients that their outfit should be invisible in a good way — it shouldn’t be the first thing you notice. When someone looks at the portrait, they should see the person’s expression and confidence, not a loud pattern or an ill-fitting jacket. This is especially true for corporate work, where the goal is trust and competence.
Good wardrobe traits
- Fits well
- Feels comfortable
- Matches the intended tone
- Avoids loud logos and distracting prints
- Works with the background and color palette
Simple wardrobe guidance
- Choose solid colors or subtle textures
- Avoid shiny fabrics that catch light badly
- Avoid very tight or very loose clothing
- Bring at least one backup outfit
- Try the full outfit on before shoot day
Practical wardrobe mistakes to avoid
- Wearing something never tested in advance
- Ignoring wrinkles and fit issues
- Picking colors that clash with the location
- Choosing outfits that limit movement
- Forgetting shoes and accessories in the planning stage
A full try-on is always worth the time. What looks good on a hanger may not photograph well in motion. I’ve seen jackets that fit perfectly standing still but pulled awkwardly across the shoulders the moment the subject crossed their arms. That’s the kind of thing you only catch when you test the outfit beforehand.
Step 6: Prepare Hair, Makeup, and Grooming
Portrait sessions usually look best when grooming is controlled, not overdone. The aim is to help the subject look like their best version of themselves.
I approach this the same way I approach retouching: remove distractions, don’t transform the person. A portrait should look like the subject on a very good day, not like someone else entirely. When grooming is too heavy or too experimental, it creates a disconnect that undermines the authenticity of the image.
Planning notes
- Book haircuts or trims several days before the session
- Avoid major new skincare experiments right before shoot day
- Keep nails clean and neutral if hands will be visible
- Set makeup to match the intended level of polish
- Bring small touch-up items if needed
For natural-looking portraits
- Keep skin prep simple
- Avoid heavy shine on forehead and nose
- Make sure facial hair is trimmed evenly
- Check collars, lint, and flyaway hair before shooting
Subtle grooming errors are easy to fix in planning and annoying to fix later in retouching. A stray hair across the face might take me 20 minutes to clean up in post, but it takes five seconds to fix on set. I always do a quick visual sweep before I start shooting: collar placement, hair position, lint on dark fabrics, shine on the nose. These small checks save hours later.
Step 7: Create a Shot List Without Overcomplicating It
A shot list keeps the session focused. It does not need to be rigid, but it should cover the essentials.
I think of a shot list as a safety net, not a script. It ensures I don’t walk away from a session realizing I forgot to capture a horizontal version for the website header, or that I only have smiling shots when the client also needed something more serious. The list gives me permission to experiment because I know the must-haves are already covered.
A useful shot list usually includes
- One safe, classic portrait
- One more relaxed or candid version
- One close-up
- One wider environmental portrait
- One or two variations with different expressions or angles
For branding sessions, add:
- Vertical and horizontal crops
- With and without movement
- Looking at camera and looking off-camera
- Seated and standing versions
Why this helps
A shot list prevents the session from ending with only one usable image. It also gives the subject confidence because they know what to expect. When I explain the flow at the start — “we’ll begin with a few classic headshots, then move into some relaxed variations” — I can see the tension drop. Structure creates comfort.
Step 8: Plan the Flow of the Session
Professional sessions run better when the photographer controls the order of events.
I’ve developed a rhythm over hundreds of sessions. It’s not flashy, but it’s reliable. The first few minutes set the tone for everything that follows, so I protect that time carefully. No rushed setups, no technical fumbling, no awkward silence while I adjust settings.
A simple workflow
- Arrive early and set up
- Check light and background
- Greet the subject and settle them in
- Review wardrobe and final details
- Start with easy, low-pressure frames
- Move into directed poses and variations
- Review key images if needed
- Finish with backup shots and clean alternates
Why start easy
Most people need a few minutes to relax in front of the camera. Starting with simple frames helps them warm up before more directed shots. I usually begin with a standing pose against a clean background, something they’ve done before, nothing experimental. Once they hear the shutter and realize they’re not being judged, their shoulders drop and their expression softens. That’s when the real session begins.
Step 9: Direct Posing in a Way That Feels Natural
Good posing is not about forcing shapes. It is about small adjustments that improve posture, balance, and expression.
The biggest mistake I see inexperienced photographers make is over-directing. They throw five instructions at the subject at once — “turn your shoulders, tilt your head, relax your hands, smile more, look this way” — and the person freezes. I learned to give one adjustment at a time, let it settle, then add the next. It’s slower but the results are dramatically better.
Focus on these basics
- Relax shoulders
- Shift weight slightly
- Create space between arms and torso
- Turn the body a little instead of facing squarely every time
- Keep hands active but relaxed
- Adjust chin and head angle in small steps
A practical posing rule
Change one thing at a time. If the photographer asks for too many adjustments at once, the subject usually stiffens up.
Common posing problems
- Hands hidden or clenched
- Chin pushed too far forward
- Shoulders raised under tension
- Stiff posture from standing too straight
- Expression that looks forced because the subject is trying too hard
I watch for these constantly during a session. The chin issue is especially common — people push their face toward the camera thinking it looks engaged, but it actually creates tension in the neck and jaw. A slight chin down and forward, almost counterintuitive, usually looks more natural on camera.
Step 10: Build in Time for Review and Adjustments
A session should always leave room for small corrections. That is how you avoid discovering problems after the subject has left.
I do a quick review every 15–20 frames, not to judge the images artistically, but to catch technical issues. A collar that’s folded wrong, a reflection in glasses that I didn’t notice, a stray hair that’s casting a shadow across the eye. These things are invisible in the moment but glaring on screen.
Check during the session
- Is the wardrobe sitting well?
- Is the background clean?
- Are glasses reflecting too much light?
- Is hair falling in the right place?
- Is the expression matching the intended mood?
- Is the framing working for the planned crop?
Why this matters
A five-second check can save hours of retouching or reshooting. It is much easier to fix a collar, remove a distracting object, or adjust the light during the session than afterward. I learned this lesson after a session where I didn’t notice a reflection in the subject’s glasses until I was editing. It took me 45 minutes per image to clean up, and I still wasn’t happy with the result. Now I check reflections obsessively before I even start shooting.
Step 11: Keep the Client Comfortable
Confidence shows in portraits. Comfort is not a soft extra; it is a technical advantage.
When a subject is uncomfortable, their body language closes off. Shoulders creep up, hands disappear, the jaw tightens. No amount of lighting or composition can fix that. I treat comfort as part of the technical setup — it’s as important as exposure or white balance.
Ways to keep the session calm
- Explain the plan before shooting
- Give one instruction at a time
- Show a few frames if it helps build trust
- Keep the pace steady
- Avoid too much technical talking during the shoot
What subjects need most
- Clear direction
- Reassurance
- Small wins early in the session
- Enough time to relax into the process
The more comfortable the subject feels, the more natural the final images will look. I often show a frame or two early in the session — not for approval, but to show them they look good. That small moment of proof changes everything. They stop worrying and start participating.
Step 12: Know What to Send Before the Shoot
A short preparation message can dramatically improve results.
I send this 48 hours before the session. Any earlier and it gets forgotten; any later and the subject doesn’t have time to act on it. The message is brief and specific — no paragraphs of philosophy, just the practical details they need to show up prepared.
Useful pre-session details
- Arrival time
- Parking or access instructions
- What to wear and avoid
- Hair and makeup guidance
- What to bring
- Who to contact if something changes
What to ask clients to bring
- Backup outfit
- Touch-up items
- Water
- Any brand materials or reference images
- Glasses, accessories, or props if relevant
A Practical Portrait Session Planning Checklist
Use this as a quick planning reference.
- Confirm the purpose of the portraits
- Define final usage and crop needs
- Choose the location
- Check light and access
- Send the prep guide
- Confirm wardrobe in advance
- Review hair and grooming notes
- Build a short shot list
- Pack backup gear
- Leave time for setup and buffer
- Keep the session flow simple
- Review key frames before wrapping
Typical Mistakes to Avoid
| Mistake | Why it hurts the session | Better approach |
|---|---|---|
| No clear purpose | The images feel generic | Define where the photos will be used |
| Weak wardrobe guidance | Distracting or unflattering clothes | Share simple outfit rules early |
| Rushed timing | Tension shows in expression | Add buffer time |
| Overcomplicated posing | Subjects look stiff | Use one instruction at a time |
| No backup plan | Weather or access problems derail the shoot | Plan an alternate option |
| Ignoring background clutter | The subject gets lost visually | Scout and simplify the scene |
FAQ
How far in advance should a portrait session be planned?
For a standard professional session, planning should start several days ahead, and longer if wardrobe, location access, or styling coordination is involved. I typically begin the conversation at least a week before the shoot date. This gives enough time to discuss goals, scout locations, and handle wardrobe decisions without pressure.
How many outfits should be prepared?
One main outfit is usually enough for a simple headshot session. For branding or editorial work, two to three looks gives more flexibility. I recommend one primary outfit that the client knows works well, plus a backup that offers a different tone — perhaps one formal and one relaxed. This variety covers more use cases without overcomplicating the session.
What makes a portrait session look professional?
Clear planning, controlled light, a clean background, appropriate wardrobe, calm direction, and consistent editing. These elements work together. You can have beautiful light, but if the background is cluttered or the subject looks uncomfortable, the image won’t feel professional. The magic is in the combination, not any single factor.
Should clients receive posing guidance before the shoot?
Yes. Even a short explanation helps reduce stress and improves expression, posture, and overall confidence. I send a few simple notes ahead of time: stand tall, relax your shoulders, breathe naturally. Nothing complicated. Just enough to give them a mental framework so they don’t feel completely unprepared when I start directing.
What is the biggest planning mistake?
Starting the session without clarifying the portrait’s purpose. When the use case is unclear, nearly every other decision gets harder. I’ve seen sessions where the photographer produced beautiful images that were completely wrong for the client’s needs — wrong crop, wrong tone, wrong background. All because nobody asked the fundamental question: what are these for?
Conclusion
A professional portrait session works best when the photographer plans for purpose, light, wardrobe, timing, and comfort before the first frame is taken. The more clearly the session is prepared, the easier it is to create portraits that look natural, polished, and useful.
Strong portraits are not about luck. They come from a repeatable process, careful communication, and small decisions that remove friction before the camera starts shooting. Every session I’ve planned well has delivered images the client actually uses. Every session I’ve rushed has produced photos that sit forgotten in a folder. The difference is always in the preparation.