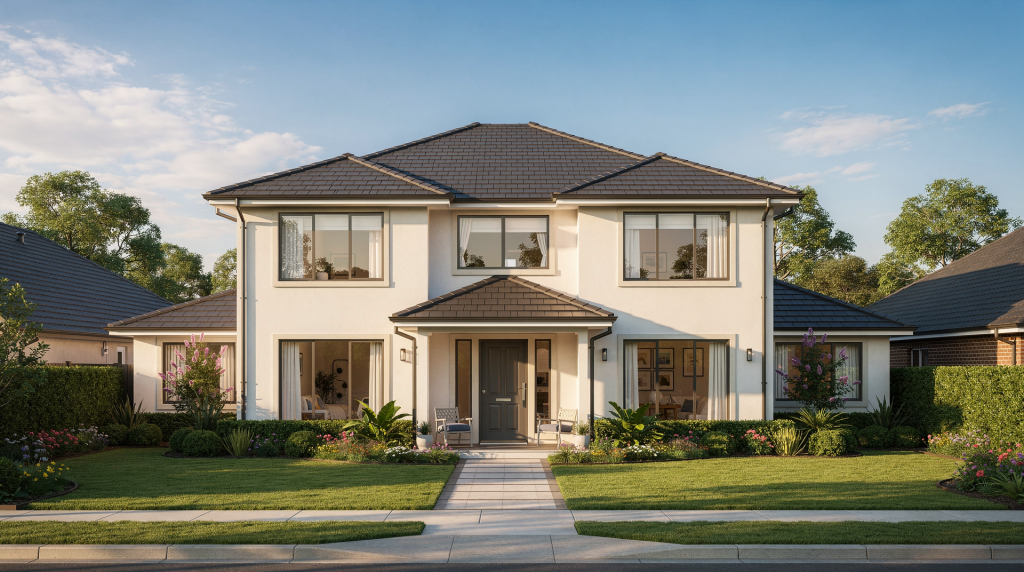
A strong exterior photo does more than document the house—it makes buyers want to click, look closer, and imagine themselves arriving at the front door. After years of shooting everything from compact urban condos to sprawling rural estates, I’ve learned that the best results come from careful planning, the right light, a clean scene, and a composition that shows both the home’s character and its depth. This isn’t about making a property look unreal; it’s about presenting it at its most credible, attractive, and saleable moment.
Why exterior photos matter so much
The exterior image is often the first visual a buyer sees in a listing, so it carries more weight than almost any other frame. In my work with real estate agents, I’ve seen a flat, poorly lit front shot make a well‑kept property feel ordinary, while a thoughtful image can make the same home look inviting, spacious, and worth exploring. Buyers scroll through dozens of listings in minutes—if the hero shot doesn’t stop them, they won’t click. The goal isn’t to create a fantasy; it’s to show the house at its best, in a way that feels both accurate and compelling.
What makes a curb appeal photo work
A high‑performing exterior photo usually has four things working together. Miss one, and the image often feels amateur even when the property itself is strong.
- Clear view of the front facade and enough angle to show depth. A straight‑on shot compresses the home into a flat plane. Angling the camera reveals the side wall, porch depth, or landscaping layers that make the structure feel three‑dimensional.
- Soft, flattering light without harsh shadows or blown highlights. Light that’s too hard creates distracting contrast and hides detail in deep blacks or clipped whites. Soft light wraps around architectural features and keeps textures readable.
- Clean surroundings with no clutter, vehicles, or distractions. Every object in the frame competes for attention. Cars, bins, and garden hoses pull the eye away from the house and suggest neglect, even if the home is immaculate inside.
- Straight vertical lines and a stable, level composition. Tilting the camera up makes walls appear to lean backward, which distorts proportions and feels unsettling. Keeping the sensor parallel to the ground preserves the architectural integrity of the building.
Best time of day to shoot the exterior
Light is the single biggest factor in exterior photography. I plan every shoot around the sun’s position because no amount of post‑processing can fully rescue harsh midday shadows or a backlit facade. The most flattering results usually come during golden hour, roughly one to two hours after sunrise and before sunset. In practice, I find the sweet spot is often the 30–60 minutes right after sunrise or before sunset, when the sun is low enough to cast a warm, directional glow and shadows are long but soft. Early morning also tends to have cleaner air and fewer people around, which helps when you’re working in busy neighbourhoods.
Best lighting conditions by scenario
| Condition | What it does | Best use |
|---|---|---|
| Golden hour | Warm tones, soft shadows, natural depth | Most front exteriors |
| Overcast day | Even light, fewer hard shadows | Homes with strong contrast issues or reflective surfaces |
| Bright sun with sun behind camera | Good illumination on the front of the house | Quick daytime sessions when rescheduling isn’t possible |
| Twilight | Attractive glow from interior and exterior lights | High‑end listings, dramatic curb appeal |
If I have flexibility, overcast weather is often the easiest for balanced exposure—it acts like a giant softbox and eliminates the battle with harsh shadows. Golden hour adds more visual warmth and depth, which can elevate a mid‑range property. When I’m forced to work in direct sun, I’ll use a diffuser or wait for a cloud to pass; even a few minutes can make a noticeable difference.
How to prepare the property before shooting
A clean exterior can make a larger difference than expensive gear. I’ve walked onto properties where the house was beautiful but the front yard looked like a storage area, and no wide‑angle lens or HDR technique could fix that. Before I even take the camera out of the bag, I do a walkaround and clear anything that competes with the house for attention. This prep isn’t just cosmetic—buyers read clutter as effort, and effort affects perceived value.
Exterior prep checklist
- Move cars away from the front of the property if possible—even a car in the driveway can dominate the frame and date the photo.
- Hide trash cans, bins, garden tools, hoses, and children’s toys.
- Close garage doors, side gates, and any unnecessary exterior doors so the home looks secure and tidy.
- Sweep walkways, driveways, and steps; remove visible oil stains, leaves, and debris.
- Straighten outdoor furniture and porch items—symmetry or intentional arrangement reads as cared‑for.
- Turn on exterior lights for twilight shots so the property feels alive rather than vacant.
- Check that curtains or blinds are even inside visible windows; uneven window treatments look sloppy from the outside.
I’ve had shoots where the agent insisted the car “added lifestyle,” but in the final image it just pulled focus. Unless the garage is a key feature, keep vehicles out of the frame.
Finding the right angle
One of the most common mistakes I see—both from homeowners and agents trying to shoot their own listings—is standing directly in front of the house and shooting flat‑on. A straight‑on image compresses the structure into a single plane, hiding the depth that makes a home feel spacious. Shooting at an angle usually works better because it reveals both the front facade and part of the side wall, giving the viewer a sense of volume and approach.
Good angle choices
- Front corner of the property to show the main facade and side depth—this is my default starting point.
- Slight offset from the driveway or sidewalk for a natural approach view that mimics how a buyer would walk up.
- A viewpoint that includes landscaping, porch depth, or architectural details without letting them overwhelm the house.
- A position that avoids making the home look cramped by nearby objects; sometimes moving just a metre left or right eliminates a pole or tree that was growing out of the roof.
I walk the property and test multiple positions before settling on the main hero shot. Small changes in position can dramatically improve symmetry, depth, and how welcoming the house feels. I’ll often crouch slightly or move laterally to see how the roofline interacts with the sky.
Camera height, framing, and composition
Exterior photos usually look best when the camera is held at a stable, human‑feeling height—roughly chest level—rather than too low or too high. Zillow’s recommendation to shoot at chest height in landscape orientation holds up well for most listings. A tripod is non‑negotiable for me: it keeps the framing steady, the horizon level, and lets me fine‑tune composition without introducing shake.
Composition rules that improve curb appeal
- Keep vertical lines straight whenever possible. Converging verticals make a home look like it’s falling backward, which is one of the fastest ways to make an image feel amateur.
- Avoid tilting the camera upward unless you plan to correct perspective in post. If I have to tilt, I’ll leave extra space around the house for cropping after correction.
- Leave enough breathing room around the house so it doesn’t feel cut off—at least a small margin of sky and foreground.
- Include the front yard, driveway, or walkway when they add value; a winding path can lead the eye right to the front door.
- Frame the home so it feels balanced, not crowded by trees, poles, or neighbouring structures. I often shift my position to give the house clear separation from background elements.
If the property is a two‑story home, a tilt‑shift lens is a powerful tool for reducing perspective distortion from ground‑level shooting. Without one, I’m careful not to exaggerate the vertical lines by aiming the camera too far upward. Sometimes simply stepping back and using a slightly longer focal length helps keep lines straight while still showing the full facade.
What to include in the shot
A curb appeal image should show the property, but it should also suggest how the home lives. That means including features that help a buyer imagine daily use and ownership. I think of the hero shot as the opening sentence of a story—it needs to introduce the main subject and hint at what’s to come.
Useful exterior features to capture
- Front facade and entrance—the door should be clearly visible and inviting.
- Landscaping and front garden, but only if they’re well‑maintained; overgrown shrubs can hurt more than they help.
- Porch, deck, or balcony, especially if they add usable outdoor space.
- Driveway or garage, if they’re part of the property’s appeal.
- Pathway and approach to the door—this creates a natural leading line.
- Pool, patio, or backyard when relevant, usually as supporting shots rather than the main hero.
You usually want one strong front hero image, then a few supporting angles that show the rest of the exterior story. For larger homes, I add side views or outdoor living areas so the listing feels complete and the buyer doesn’t have to guess what’s around the corner.
How to handle common lighting problems
Not every shoot happens in ideal conditions. Good exterior photography is often about solving light problems without making the photo look over‑processed. I’ve learned to work with what’s there rather than fight it.
Harsh sunlight
When the sun is high, shadows get sharp and windows can look blown out. If rescheduling is impossible, I shoot with the sun behind the camera so the front of the property is evenly lit. A diffuser held between the sun and the house can soften the contrast, though on a large facade it’s not always practical. I’ll also underexpose slightly to preserve highlight detail in windows and bring up shadows in post, but I keep it subtle—over‑recovered shadows look unnatural.
Backlit houses
If the sun is behind the home, the front falls into shadow and loses detail. I shift my angle so the light hits the facade more directly, or wait until the sun moves to a better position. Sometimes a reflector can bounce light back onto the front, but for a whole house that’s rarely feasible. In those cases, I’ll bracket exposures and blend them carefully, ensuring the shadow side still looks like it belongs in the same scene.
Bright reflections
Windows, cars, and shiny exterior finishes can create distracting glare. A slight change in angle often eliminates reflections that ruin the frame. I’ll also shoot when the sun is lower and softer, or use a polarising filter to cut reflections on glass and foliage. Even a small shift left or right can move a hot spot off a window entirely.
Gear that helps, without overcomplicating the job
You don’t need a huge kit to shoot good exterior photos, but a few tools make the process easier and more consistent. I’ve shot listings with everything from a full‑frame DSLR to a mirrorless setup, and the principles remain the same.
Practical gear list
- Camera with manual control—aperture priority or full manual lets you manage depth of field and exposure consistently.
- Wide to standard zoom lens, such as 24–70mm for most homes. This range frames the front of the home and nearby context without extreme distortion.
- Tripod for sharp, level images. It’s essential for keeping verticals straight and for bracketing exposures without shifting the frame.
- Optional tilt‑shift lens for architectural correction on taller properties, though I often rent one only when the job demands it.
- Diffuser for harsh sun—a large collapsible panel can soften light on a portion of the facade if you’re working close.
- Cleaning cloth for the front element and quick touch‑ups; dust spots on a wide sky are a pain to remove later.
Wider than 24mm can be useful on large estates, but I avoid going so wide that the house stretches unnaturally. A 16–35mm on a full‑frame body can work if I’m careful about keeping the camera level and the subject centred, but I prefer the 24–70mm for its more natural perspective.
A simple step‑by‑step workflow
I follow the same sequence on almost every exterior shoot. It keeps me efficient and ensures I don’t miss the best light.
Exterior shoot workflow
- Check the weather and sun position before arrival. I use apps to see exactly where the sun will be at the scheduled time.
- Walk the property and identify distractions, shadows, and the most promising angles. I’ll take a few test shots with my phone to preview composition.
- Clean up the front area and move visible clutter. I involve the homeowner or agent so nothing gets missed.
- Set up the tripod and level the camera. I use the in‑camera electronic level or a hot‑shoe bubble level.
- Shoot the hero front angle first while the light is best. I’ll bracket exposures if the dynamic range is wide.
- Capture alternate angles from the corners and approach path, always checking verticals.
- Photograph key features like porch, patio, driveway, or backyard as supporting shots.
- Review images on location to confirm verticals, exposure, and composition. I zoom in to check for distractions I might have missed.
That order matters. The best light often doesn’t last long, so I prioritise the main exterior shot before moving into supporting angles. I’d rather have one excellent hero image than ten mediocre ones.
Typical mistakes to avoid
| Mistake | Why it hurts | Better approach |
|---|---|---|
| Shooting straight‑on only | Reduces depth and makes the home look flat and uninviting | Use an angled view to show the facade and side wall |
| Photographing at noon | Creates harsh shadows and weak curb appeal; windows often blow out | Shoot in golden hour or overcast light |
| Leaving clutter in frame | Distracts from the property and signals neglect | Clear the scene completely before composing |
| Tilting the camera upward | Causes converging verticals that distort the building | Keep the camera level or use a tilt‑shift lens |
| Ignoring background distractions | Poles, wires, cars, and bins pull attention away from the house | Reposition or crop carefully, or clone out minor distractions in post |
| Forgetting exterior lights at dusk | Twilight scenes feel flat and empty without interior and exterior lights on | Turn on all visible lights before shooting |
Quick checklist before you press the shutter
- Is the front of the home clean and uncluttered?
- Are the vertical lines straight and the horizon level?
- Does the angle show both depth and curb appeal?
- Is the light soft enough to flatter the facade without harsh shadows?
- Are cars, bins, and hoses completely out of the frame?
- Does the image include something that helps the buyer imagine living there—a welcoming path, a porch, or a well‑kept garden?
If the answer to any of those is no, I adjust before shooting the final frame. It’s much easier to fix these things on site than to try to rescue an image in editing.
When twilight is worth it
Twilight shots take more planning, but they can create a premium feeling that sets a listing apart. They work especially well when the home has attractive exterior lighting, a warm interior glow, or a strong architectural silhouette. I’ve used twilight images for high‑end properties where the goal was to evoke a sense of arrival and luxury. If you go this route, keep the lights on inside and outside so the property feels alive rather than empty. I typically arrive about 20 minutes before sunset, set up, and shoot as the sky transitions from deep blue to black, bracketing to capture both the ambient light and the artificial lights.
Twilight isn’t mandatory for every listing. It’s most effective when the home has enough visual quality to support a dramatic presentation. For a modest suburban house, a clean golden‑hour shot often does the job better and requires far less coordination.
Final thoughts
The best property exterior photos aren’t accidental. They come from smart timing, clean preparation, and a composition that makes the home feel both accurate and desirable. When I look back at my early real estate work, the images that failed were almost always the ones where I rushed the prep or ignored the light. Controlling those variables—light, clutter, angle, verticals—transforms a snapshot into a marketing asset. If you focus on those fundamentals, you’ll dramatically improve curb appeal and listing performance without needing a bag full of expensive gear.
FAQ
What is the best time to photograph a house exterior?
Golden hour is usually the best choice, especially one to two hours after sunrise or before sunset, because the light is warm and soft. Overcast days can also work well for even illumination.
Should exterior photos be taken straight on?
Usually no. An angled shot works better because it shows more depth and makes the home feel more dimensional. A straight‑on image often looks flat and fails to convey the property’s true size.
What if the weather is sunny and harsh?
Shoot with the sun behind the camera when possible, or use a diffuser to reduce contrast and shadow depth. If you can, wait for a cloud to pass—even a brief softening of the light helps.
Do I need a special lens for exterior real estate photos?
Not always. A 24–70mm lens covers most homes well, while a tilt‑shift lens helps reduce distortion on taller properties. For most listings, a standard zoom and a tripod are sufficient.
What should I remove before photographing the front of a home?
Cars, trash cans, toys, tools, hoses, and anything that makes the front feel busy or neglected should be removed or hidden. Even small items like a coiled hose can draw the eye away from the house.
How many exterior photos should a listing have?
At minimum, include one strong front hero image and several supporting shots of the back, sides, driveway, porch, or other standout features. The goal is to give buyers a complete sense of the property’s exterior without overwhelming them.